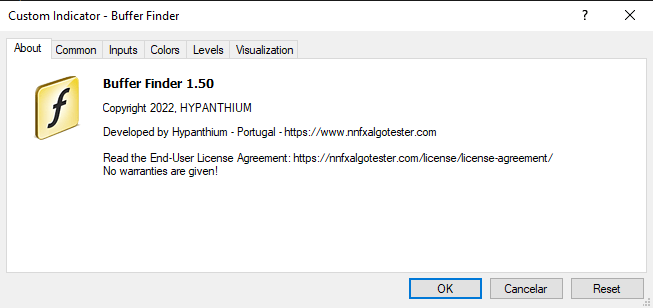
Buffer Finder
Are you looking for buffers?
The Buffer Finder is a very useful tool. The Buffer Finder is an indicator that allows you to analyze another external indicator and expose it all buffers. This is useful because some indicators hide they buffers from his user, which makes your configuration in the NNFX Algo Tester more difficult.
With the help of Buffer Finder you can see all the buffers from another indicator and check which buffers are relevant to you and those you want to use.
The Buffer Finder is able to analyze up to 20 different buffers (the first 20) of an indicator, which covers 99% of the indicators available for the MT4.
Download:
So let's analyze an indicator where this Buffer Finder can be useful.
- The indicator we want to use "trend-direction-force-index-indicator" has only one indicator we can see in MT4 Data window. So the configuration looks quite simple for this "zero cross" indicator.
We can use the ONE LEVEL CROSS option with level 0 and buffer 1, like this:
;trend-direction-force-index-indicator;1;0
After the NNFX Algo Tester configuration the backtesting looks like it doesn't run as we predict (although there are no errors), with the entries at wrong places.
Let's use the Buffer Finder to confirm that our configuration is correct.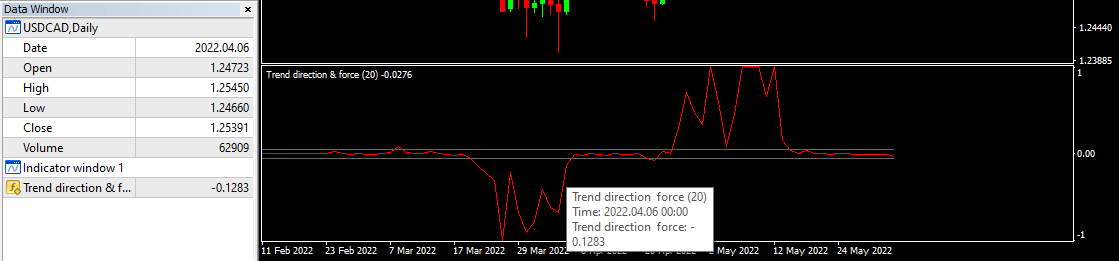
- Let's put the Buffer Finder on the chart along with "trend-direction-force-index-indicator".
Before clicking OK, we must put the name of the indicator we want to analyze ("trend-direction-force-index-indicator"). The name of the indicator follows the same rules as the INDICADOR NAME.
Then click OK.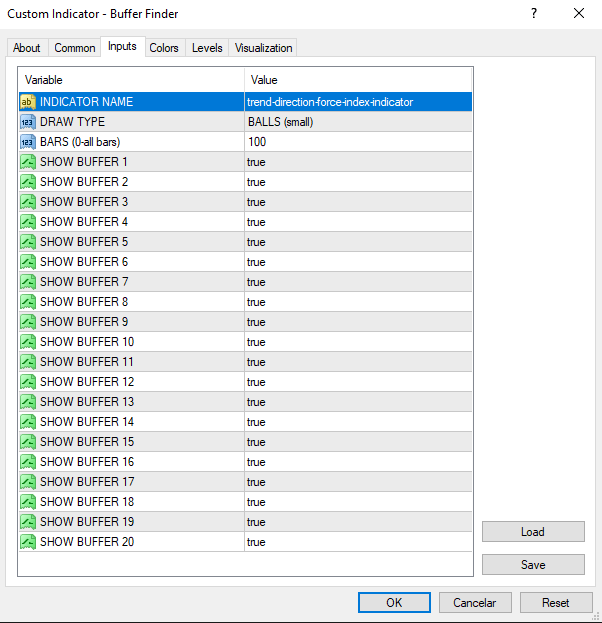
- After the Buffer Finder started we can see in the Data window all your buffers. These are indeed the same buffers that exist in the "trend-direction-force-index-indicator". If we look carefully we can see that the "trend-direction-force-index-indicator" has not only one buffer but 6 different bufffers that we can use.
We can use any of these buffers in the NNFX Algo Tester configuration. In this case we want to use the buffer that represents the red line of the indicator.
We can see that the buffer that has the same value of the line is buffer 3.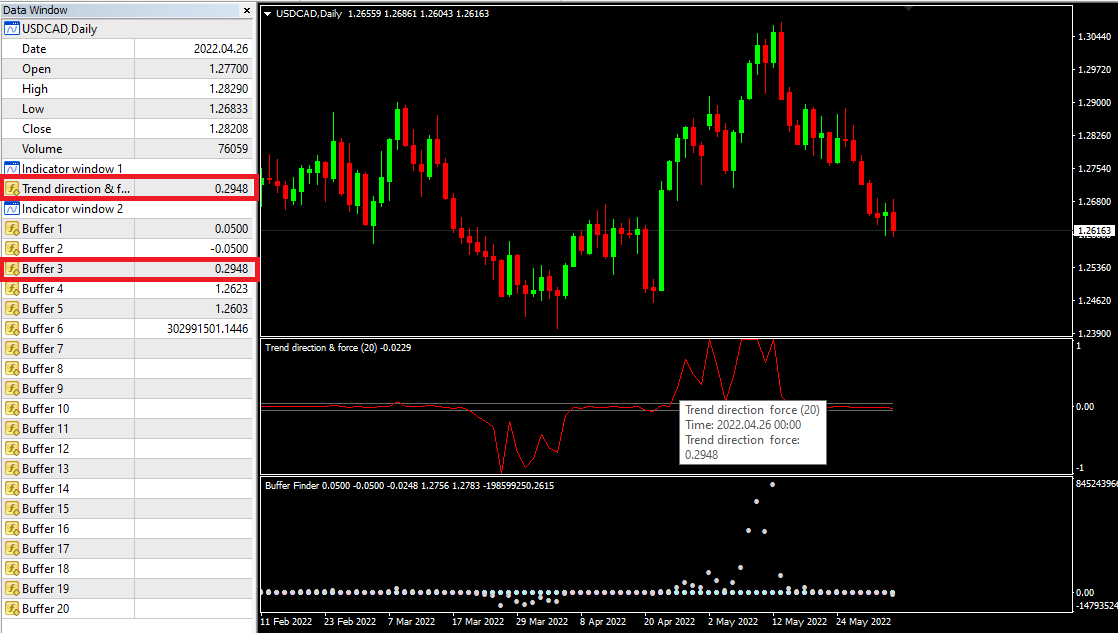
- To better see the Buffer 3 in the Buffer Finder window we can configure the Buffer Finder indicator to show only this buffer and draw it as a line.
After the setting we click OK.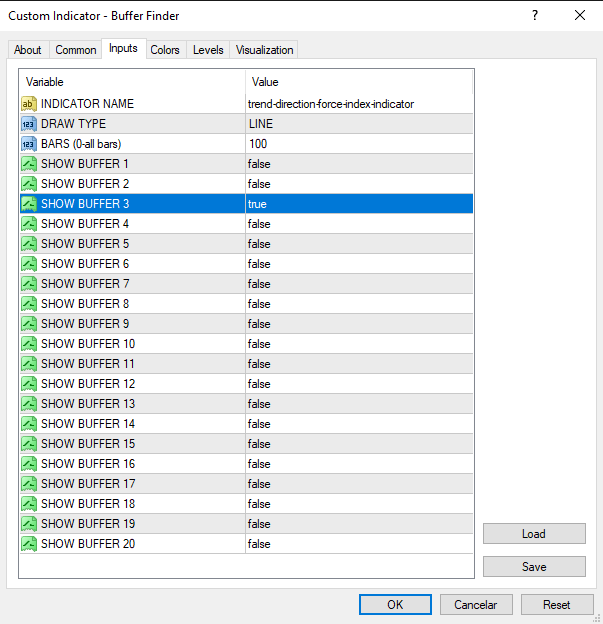
- And now we can clearly see that the line is actually represented by the Buffer 3 and not Buffer 1.
Knowing this we can change to the correct indicator configuration.
So, use the ONE LEVEL CROSS option with level 0 and buffer 3, like this:
;trend-direction-force-index-indicator;3;0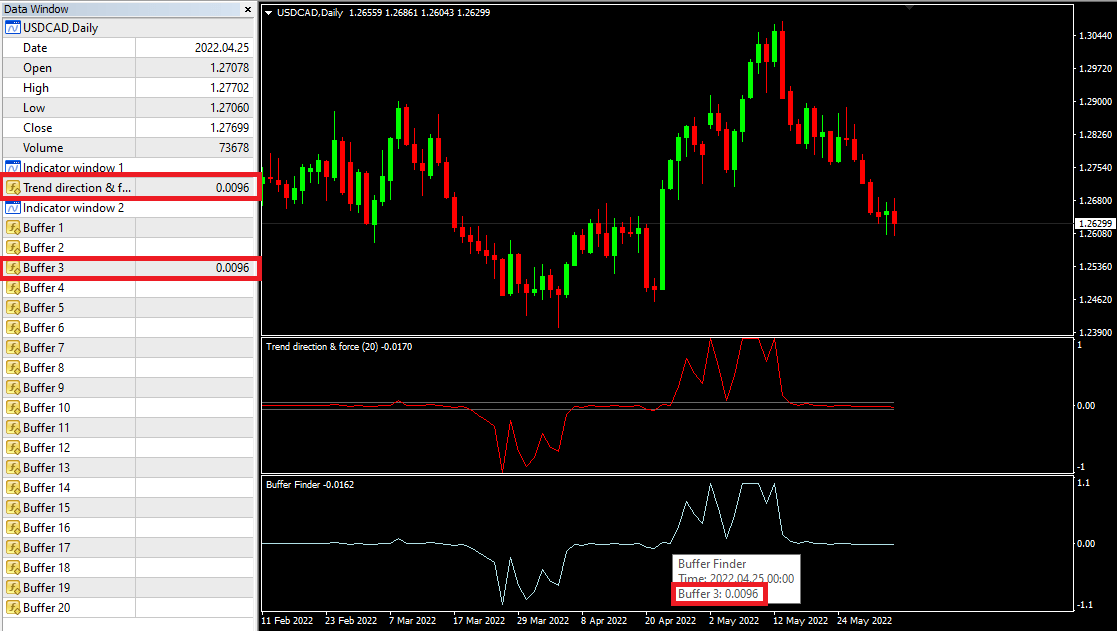
So, as you can see the Buffer Finder can be useful in several cases. When the configuration seems correct but the backtest shows wrong entries this may just mean that you are using a wrong buffer, and is easily fixed. The Buffer Finder is also useful for finding new buffers that can help set up a particular indicator in a different way.